This project, the creation of two communion spoons, was commissioned on the behalf of Ss. Joachim and Anna Orthodox Mission in Goldendale, WA (my home parish). This project involved both lost wax carving and casting, and hand fabrication.


Above you can see the original drawing. The design was inspired by a combination of a spoon our priest and deacon preferred, several different spoons I had researched, and some ornamental knot work I had recently done (St. Ita Cross). I then size and transfer the drawing onto the wax block, and start carving.

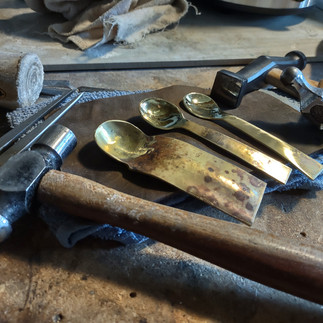


The fabrication portion of the project started with working brass samples for Fr. John to approve. This was a learning process, as this was the first time I had fabricated a spoon. Of course, I lacked the first hand knowledge of what makes a good communion spoon from the perspective of the one serving. As you can see in the picture, it took three attempts to arrive at the final design. I used this as my pattern for the final version of the spoons.
Next was marking out the design on the Argentium sterling silver blanks I had prepared. I chose to use Argentium mainly due to it's ability to harden more than traditional sterling silver, which should result in a spoon that is less likely to bend.
The third picture shows the materials for the project. From left to right: a Makume Gane blank for the back of the handle, two argentium silver blanks, one of the unfinished handle top plates, and 16 gauge sterling silver wire (used to make the pins that join the handle materials to the main part of the spoon.
The fourth image is the rough shape of the spoons pierced from the blanks. This was done by hand with a jeweler's saw. The thickness of the blanks (14 gauge) and their size made this quite an effort and has caused me to consider using a powered scroll saw in the future (45 year old shoulder making a convincing argument!).
The last image shows the spoons after the shape has been hammered into them. My tools are simple, mainly a rawhide mallet, ball-peen, and planishing hammers.


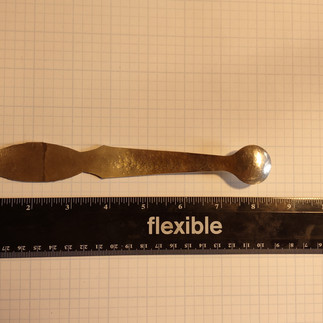
Here you can see the size and shape of the rough spoons. They are about 8 1/4 inches long.
This is a timelapse of some of the hand finishing of the spoons. This removes the hammer marks and brings the silver to a sanded finish. The main part of the spoon is subsequently polished in preparation for assembly.


Here you can see the three parts of the spoon ready for assembly. From top to bottom: main spoon, back of the top plate, back of the bottom plate. On the right, the spoons are being assembled. The top spoon has it's pins set. The one underneath has only the top and bottom pins set.


After all the pins are set, final finishing is done, and patina applied to the the handle.

Please contact me if you are interested in commissioning a communion spoon.
Comentarios